Forms is a section of the system designed to replace cumbersome paper forms and gather required information from onboardees. You can use Forms in Webonboarding to replicate current paper forms in a format that can merge across existing information and allow onboardees to complete the Form on their mobile device.
Webonboarding Forms are much more effective than using PDF or Word files in the Documents section as you can define how an onboardee needs to answer and they are designed to be responsive to mobile browsers. This reduces input errors and makes things simpler for onboardees.
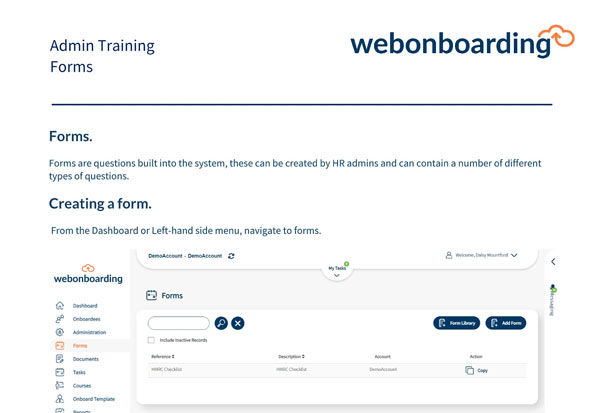
Creating a Form
From the Dashboard or Left-hand side menu, navigate to forms.

Click, “add form” on the right hand side.

Start in the General tab.

|
Heading |
Description |
|
Reference |
A unique reference for this form – use version numbers to help control and track changes |
|
Description |
A short description of the form |
|
Instructions |
Here you can add a fuller description of what you expect the onboardee to do and why you are asking them to complete the form. This gets displayed to the onboardee and is |
Adding Questions
You can then start to build the questions within your form. Every form must have at least one section and one field. Sections are a great way to separate different types of information you are asking for. Some examples might be the sections of a tax form separating personal details from statements you need the onboardee to make, or splitting something like employment history from a declaration.
To start you must click “add new section” at the bottom right hand side.

Once you have clicked add new section you will be able to start to fill out the section details.

|
Heading |
Description |
|
Section Label |
A unique label for the section to communicate to the onboardee what this section is for. These appear as tabs in the Forms section for Onboardees |
|
Section Key |
A unique reference for this section. This is used when exporting the form data and forms part of the field label in the export. |
|
Description |
Here you can add a description of what this section is for. This gets displayed to the onboardee and is visible on this section of the form. |
|
Repeatable |
Select this box if you want all the fields in this section to be able to be repeated a number of times. When selected you are able to define the maximum number of responses. This is useful for things like employment history. |
You are also able to Delete sections providing they have not yet been saved by an onboardee in their process.
You can then add fields (questions) to the section you have created. Click “Add New Field” at the bottom right hand side.


|
Heading |
Description |
|
Question Number |
A number to display against the question field (optional) |
|
Label |
A label for the field to communicate to the onboardee what this field is for. Use for the questions you want to ask the onboardee. |
|
Field Key |
A unique reference for this section. This is used when exporting the form data and forms part of the label in the export alongside the section key. |
|
Description |
Here you can add a description of what this field is for. This gets displayed to the onboardee above the area for the response. This is particularly useful for questions that have long descriptions about them or the answers. |
|
Type |
This defines the type of response that the onboardee will need to give. (See field type table below) |
|
Merge Field |
Certain types allow you to merge information from other areas of the system, use ‘Show Merge Fields’ to search for merge fields to include for that type of response. |
|
Mandatory |
If selected the Onboardee must respond to this field in order to complete the Form fully. |
|
Active |
Makes a field Active or Inactive in an existing Form. |
There are a 7 types of responses to fields in a form on Webonboarding. Please see details below:
|
Type |
Description |
|
Text |
A free text box allowing numbers, letters and symbols. (Merge fields available) |
|
Numeric |
A free text box only allowing numbers. (Merge fields available) |
|
Date |
Allows a date to be entered or selected in a calendar format. (Merge fields available) |
|
Radio button |
Will allow you to create a multiple choice list with buttons to select a single response. Defaults to Yes and No as answers but you can add more response. |
|
Drop down |
Allows you to create your own dropdown menu with your own responses for the onboardee to select from. |
|
Text area |
Creates a large free text box for the onboardee to complete a more detailed response. |
|
Boolean |
Adds a check box for an onboardee to confirm wether something is true or false, for example. Useful for declarations and signature substitutes. |
As mentioned above we have included the option to add merge fields as responses for Form fields. This eliminates the pain point of an onboardee having to repeat information that Webonboarding has already collected, for example first name and surname.
When you click the ‘Select merge field’ link on an appropriate field the below will display:

Simply search by the field name or description to find the required merge information, tick the check box to the left of the item and select ‘OK’ to add it to a field.
Previewing the Form
When creating a Form you can preview it at any time using the preview button on the right hand side.

When you click this you will be able to see the sections and fields included in the Form as an example of how it will appear to onboardees. Please note that merge fields will not be populated in the preview section and you will not be able to preview what it looks like on a mobile device.

Once you have created your form you will need to select the companies that can have access to this form from the Companies tab, as you would with documents.
Editing a Form
You can edit an existing Form up to the point that an onboardee saves information in it. We suggest you check Forms carefully for how they appear visually and errors when creating it. You can do this by adding it to a test onboardee’s profile and logging in as them but make sure not to save the Form when leaving that section.
Once a form has been started and saved by an onboardee the form cannot be edited. To create a new version of the form you need to create a Copy.
To copy a form you can either select the Copy action from the right hand side of the Forms list:

Or you can click in the Form you want to change and select the ‘Copy Form’ button.

When you copy a Form the system creates a duplicate of the existing Form but without a Reference or Companies selected.

We suggest you name the Reference for the new Form with a new version number to keep track of the versions you have used. Then you can make the required changes to Sections and Fields, then select the relevant Companies to create the new version of your form.
Please note that you will need to change the Form in existing Onboardee processes and Templates in order to start using the new Form.